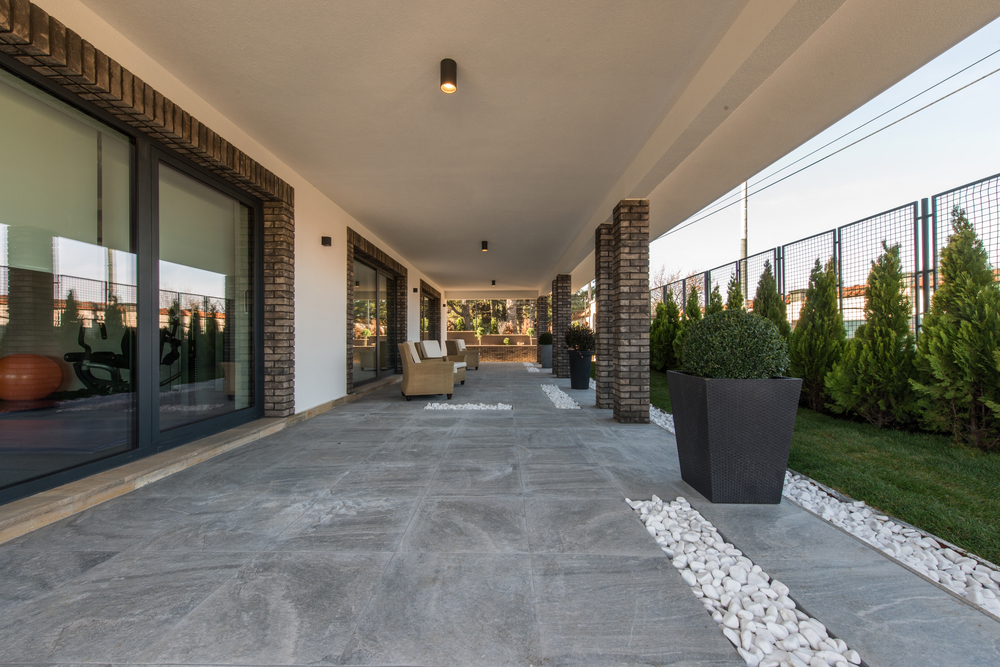
Tiling a terrace with outdoor tiles
Today we have an exciting project to share with you: the creation of a tiled terrace. I'm particularly proud of this terrace, one of the most beautiful I've had the opportunity to create in recent years. The choice of tiling plays an essential role, because you have to take into account the surrounding context to achieve a harmonious result. Here, we've emphasised the natural look of the stone. I'll explain how I approached the challenge of tiling, which involves laying tiles around a stone, creating irregular edges. We'll also be installing finishing strips along the edges of the terrace. Before that, we'll cover two crucial points: choosing the right outdoor tiles and preparing the slab. We'll also talk about drying times and the importance of slopes. Stay with us until the end of this video to discover the final rendering of this terrace and to find out about my future projects and sports bets. Come on, let's dive in.
![]()
One of the first things to consider when choosing tiles is whether they are suitable for outdoor use and frost-resistant. It must be able to withstand very low temperatures without cracking. I recommend full-body porcelain stoneware tiles for their high impact resistance. It's also crucial to choose a slightly textured tile to prevent slipping. As far as the slab is concerned, it's best to let it dry for two or three months before laying the tiles to avoid cracking or excessive expansion. The slope of the tile is also essential for good water drainage and to avoid stagnation. You should aim for a slope of around 1.5 cm per metre for good drainage.
![]()
Next, I'm going to install finishing strips around the edges of our terrace. It's crucial to leave at least two millimetres between the edge of the tiles and the strip to allow for expansion and prevent water seepage. I'll use rulers to get an even surface. When I start to fit the tile with the mallet, it will press against the ruler and the joint will take on an even shape. Then I'll move the rulers slightly and adjust with the mallet. If you see small differences in the glue marks, it's simply because there's a slight dip. Simply add a little more glue to correct this.
![]()
Next, I'll fit mouldings to give a nice finish. For the small steps, I proceed in the same way as for a staircase. I start with the riser, checking that the height is the same along the whole length. Then I cut all my pieces in one go, place my stick and finish the whole step in one go. It's essential to be meticulous and to use shims for a perfect finish.
![]()
This terrace is so complete and fascinating that I also have some tiling to do. I lay my tiles next to my cut and simply trace along my stone. In areas like this, it's best to do all the cuts dry and then glue. Remember, we're outside, so if I start gluing and cutting tile by tile, the glue will start to dry, and it won't work.
![]()
Finally, I've got some skirting boards to fit. I've made some small bevels, which you can learn how to do at the end of this video. I suggested a very light grey joint to the customers for the outside, a joint that can be used for joints longer than a centimetre and a half. It's essential to work in small areas, as outdoors the adhesive can dry very quickly. I then used a jointer tray and a small spatula to make the joints.


